

Sometimes, hiring a professional is not really a feasible thing to do. We get it – it might be that you are financially constrained, need a very small touch-up or you already have some painting skills and are ready to take on a challenge. That is fine. (You can always call us if things/brushes get out of hand…pun intended.) We are here to provide some helpful tips for your DIY painting project, so you can feel confident to tackle this tricky task.
Painting Tips
The best time to paint
Just as a right temperature makes all the difference when preparing a juicy steak, temperature of your house can greatly impact on paint application. Extreme conditions, whether cold or hot, should be generally avoided and the ideal temperature for painting must be above 10*C and below 35*C. Also, humidity can be an issue, so best avoid rainy days or if it looks as if it might rain and save your project for a more sunny day.
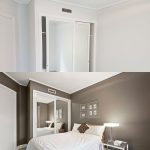
Melbourne painter
On a hot day, acrylics dry very quickly
While nice and sunny day is preferable for painting, direct sunlight isn’t. Most acrylic paints will touch dry in about twenty minutes at 25*C and 50% humidity, and direct sun will only accelerate the process. Therefore, keep in shade (this is a good advice for you too plus make sure to apply SPF on your skin) and avoid painting on hot surfaces that had been exposed to direct sunshine, but allow them to cool before painting instead. If you notice that the paint in your bucket is drying out, you can add up to 5% water into it to prevent it from drying out completely. You can also purchase a thinner designed for use in hot weather which can help you slow down the drying rate. Finally, it is a good idea to use two brushes – keep one in the bucket of water and work with the other, then alternate between the two as this will help prevent drying. Working with a quick drying paint can be challenging, so you can always give a call to our friendly painters if you’re not fully confident.
Preparation is the key
The key to a successful painting job is a good preparation. You want to protect the furniture and interior fittings the best you can to minimise the risk of damage. Take down curtains and remove mirrors, pictures and other things hanging on the walls. Move lightweight furniture out of the room to clear the space. Use plastic sheets or drop sheets to cover remaining furniture and tape plastic around pendant light fittings. If painting outside, clear your working space by removing unnecessary items out of your way and tie back any plants that might be on your way when painting.
Masking
Masking is a great way to ensure faster and cleaner painting. Attach the masking tape at your starting point and stretch it all the way toward the finishing point. Gently smooth the tape down while keeping it taut. You can then begin applying the first coat. A word of caution when removing the masking tape, however. Make sure to remove it before the paint becomes too dry as this could result in lifting and breaking the dry paint and leaving an ugly and cracked edge.
How to actually paint
OK, this may sound obvious, but there is a correct sequence of tasks and motions when painting. Begin with a ceiling and paint away from the light source so you avoid painting in shadow – this way you can see your output better. After the ceiling is finished, work your way down to the walls, then the doors and windows, and ending with the skirting and the trim. If painting weatherboards, you first paint the underside of the board and then the face. Following a particular sequence will help you organise the painting job and ultimately lead to better results.
Mix and stir for an even finish
Always read the instructions on a can of paint and make sure to stir it well before application. If using more than one can, mix all the cans into one big bucket and stir it thoroughly – this will help you achieve an even finish.
We hope this quick guide will be helpful should you decide to do a DIY paint project. Remember, however, that these are only tips and the actual experience will be make a great deal of difference. Call us for a free quote and our helpful staff will provide an estimate of costs if you decide to hire an experienced professional. Happy painting!